Using Live Preview and Content Versioning with Next.js
Published November 14th, 2023
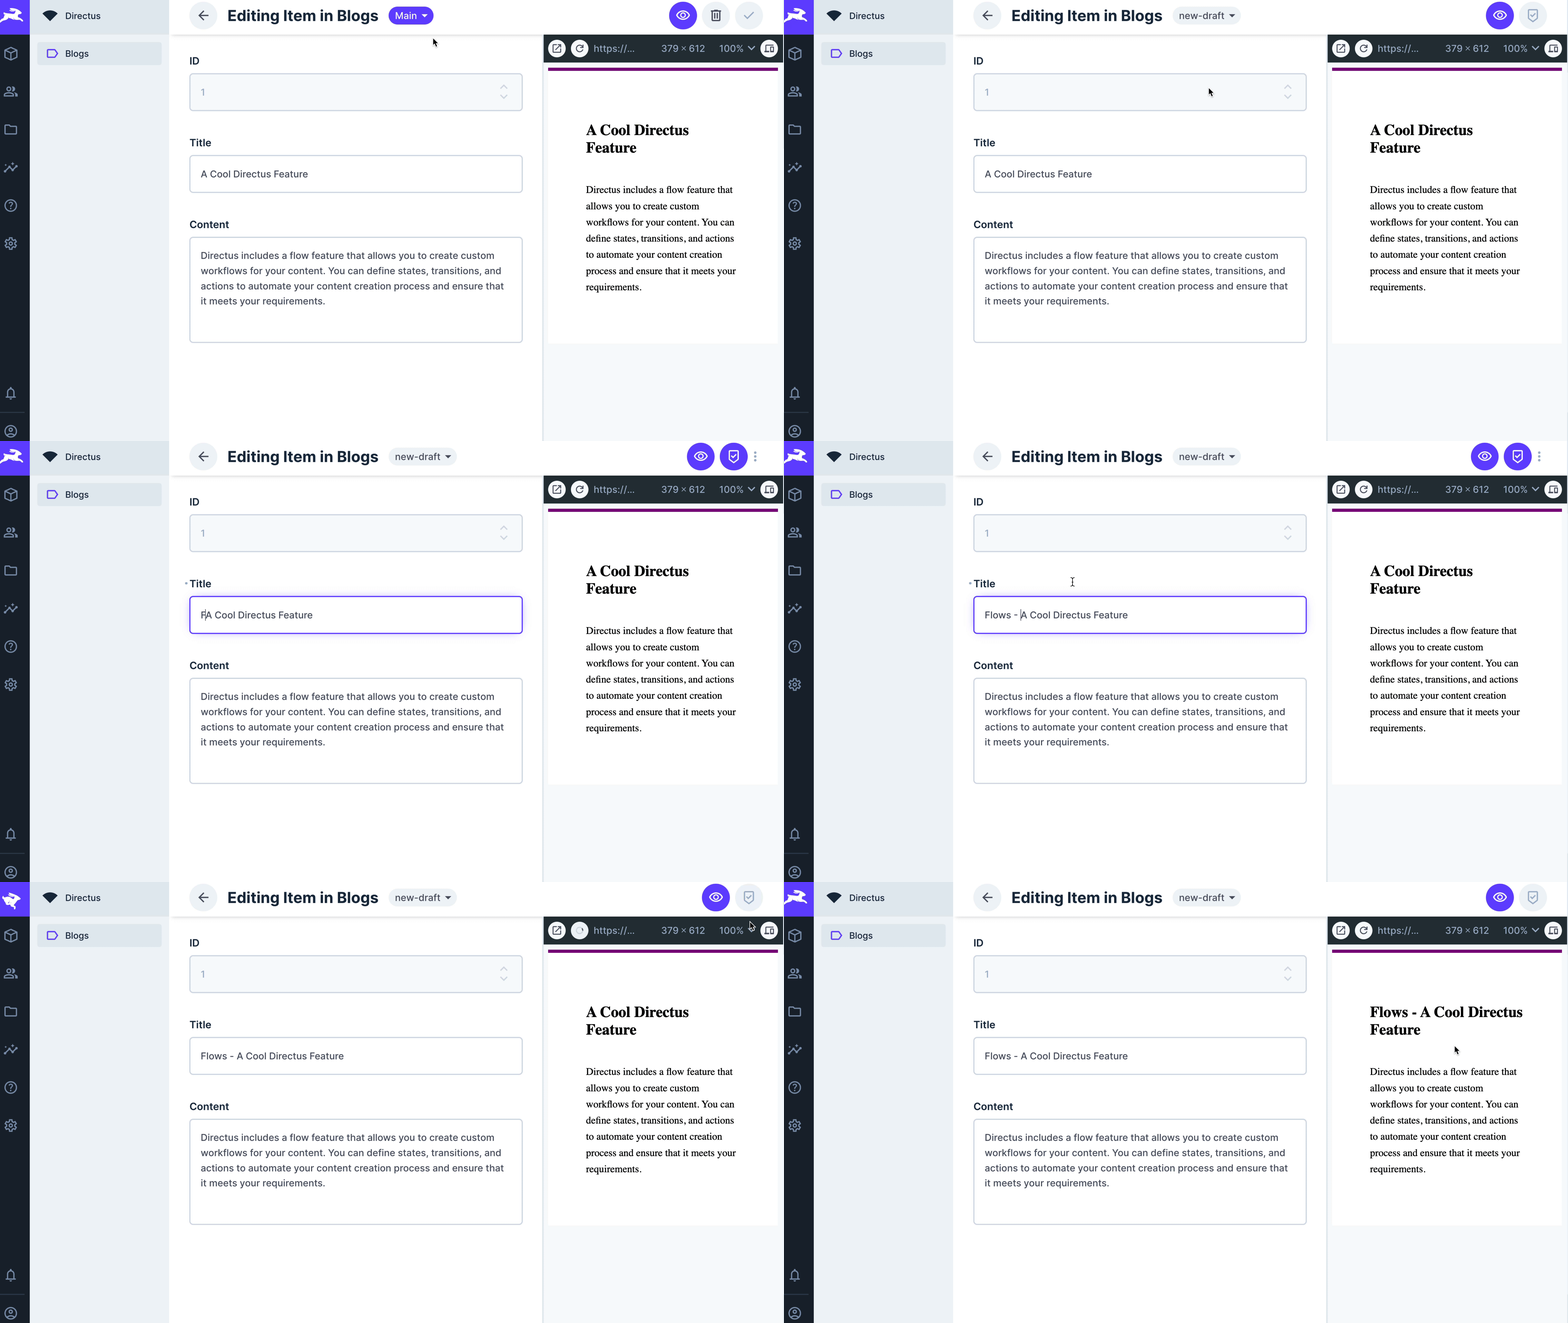
Imagine being able to create different versions of your content, and then easily preview them while still in draft mode. With Directus, you can integrate Content Versioning and Live Preview in your Next.js application, making it easier for your team to manage and preview multiple content versions.
In this post, I'll show you how to set up your Live Preview-enabled Next.js application to also allow previewing of specific content versions.

Prerequisites:
- A Directus project with at least one content versioned collection. In this tutorial, we will use a collection called
Posts. - A Next.js application with Live Preview enabled. If you don't have one, follow our guide.
- Basic knowledge of React and Next.js.
Step 1: Read the Version from SearchParams
The first step is to read the version from the URL searchParams of our post page. Since every page has access to the searchParams object, we can get the version directly.
Navigate to app/posts/[id]/pages.tsx and make the following update:
import directus from "@/lib/directus";
import { readItems } from "@directus/sdk";
import { draftMode } from "next/headers";

export default async function Post({
  searchParams,
  params: { id }
}: {
  searchParams: { [key: string]: string | string[] | undefined };
  params: { id: string };
}) {
  const { isEnabled } = draftMode();

  const post = await getPostById(id, searchParams.version?.toString());

  if (!post) {
    return null;
  }

  const { title, body } = post;

  return (
    <article>
      <h1>{title}</h1>
      <p>{body}</p>
      {isEnabled && <p>(Draft Mode)</p>}
    </article>
  );
}

export async function generateStaticParams() {
  const posts = await directus.request(
    readItems("Posts", {
      limit: -1
    })
  );

  return posts.map((post) => ({
    id: String(post.id)
  }));
}
import directus from "@/lib/directus";
import { readItems } from "@directus/sdk";
import { draftMode } from "next/headers";
export default async function Post({
searchParams,
params: { id }
}: {
searchParams: { [key: string]: string | string[] | undefined };
params: { id: string };
}) {
const { isEnabled } = draftMode();
const post = await getPostById(id, searchParams.version?.toString());
if (!post) {
return null;
}
const { title, body } = post;
return (
<article>
<h1>{title}</h1>
<p>{body}</p>
{isEnabled && <p>(Draft Mode)</p>}
</article>
);
}
export async function generateStaticParams() {
const posts = await directus.request(
readItems("Posts", {
limit: -1
})
);
return posts.map((post) => ({
id: String(post.id)
}));
}Step 2: Pass Version as Parameter to Function
Next, let's take a look at the current implementation of the getPostById function in lib/directus.ts.
export async function getPostById(id: string) {
  return await client.request(readItem('Posts', id));
}
export async function getPostById(id: string) {
return await client.request(readItem('Posts', id));
}As you’ll notice, it retrieves a post by its ID and returns its content. We'll modify the function to include a version parameter. This will allow us to retrieve specific versions of a post.
Here's the updated code:
export async function getPostById(id: string, version?: string) {
  return await client.request(readItem('Posts', id, { version }));
}
export async function getPostById(id: string, version?: string) {
return await client.request(readItem('Posts', id, { version }));
}Step 3: Extract and Add the Version to the URL
To pass the version to the URL, we need to extract the version from the searchParams in the route.ts file and add it as a query parameter to the Location header. This helps to redirect the client to the URL of the version when previewing the content.
Go into api/draft/route.ts and update the code accordingly:
import { draftMode } from 'next/headers';
import directus from '@/lib/directus';
import { readItem } from '@directus/sdk/rest';

export async function GET(request: Request) {
	const { searchParams } = new URL(request.url);
	const secret = searchParams.get('secret');
	const id = searchParams.get('id');
	const version = searchParams.get('version');

	if (secret !== 'MY_SECRET_TOKEN') {
		return new Response('Invalid token', { status: 401 });
	}

	if (!id) {
		return new Response('Missing id', { status: 401 });
	}

	const post = await directus.request(readItem('Posts', id));

	if (!post) {
		return new Response('Invalid id', { status: 401 });
	}

	draftMode().enable();

	return new Response(null, {
		status: 307,
		headers: {
			Location: `/posts/${post.id}?version=${version}`,
		},
	});
}
import { draftMode } from 'next/headers';
import directus from '@/lib/directus';
import { readItem } from '@directus/sdk/rest';
export async function GET(request: Request) {
const { searchParams } = new URL(request.url);
const secret = searchParams.get('secret');
const id = searchParams.get('id');
const version = searchParams.get('version');
if (secret !== 'MY_SECRET_TOKEN') {
return new Response('Invalid token', { status: 401 });
}
if (!id) {
return new Response('Missing id', { status: 401 });
}
const post = await directus.request(readItem('Posts', id));
if (!post) {
return new Response('Invalid id', { status: 401 });
}
draftMode().enable();
return new Response(null, {
status: 307,
headers: {
Location: `/posts/${post.id}?version=${version}`,
},
});
}Step 4: Update the URL in Directus
To configure your Directus Studio App to preview different versions of your content, follow these steps:
- Navigate to Settings -> Data Model.
- Select the collection you want to configure.
- Update the preview url with the version by selecting Version from the dropdown and entering it in this format:
http://<your-site>/api/draft?secret=MY_SECRET_TOKEN&id=ID&version=Version - Save your changes.
Replace Values
Remember to replace <your-site> with your actual website domain and MY_SECRET_TOKEN with the secret you have in your Next.js project.
Whenever you select different versions of your content, you can now preview them before publishing to your live environment.
Conclusion
In this post, you’ve learnt how to enhance your Next.js application with content versioning and live preview when using Directus. By following the four steps outlined above, you can easily manage and preview multiple versions of your content before publishing.
Have questions? Feel free to join our Discord server and reach out!