Permissions
Directus offers an extremely granular, yet easy to configure permissions system. When you create a role, all permissions are turned off by default. From here, you explicitly reconfigure its permissions for each collection as desired.
Learn More
To configure permissions programmatically, see our API documentation on permissions.
Configure Permissions

To configure a role's access permissions, follow these steps.
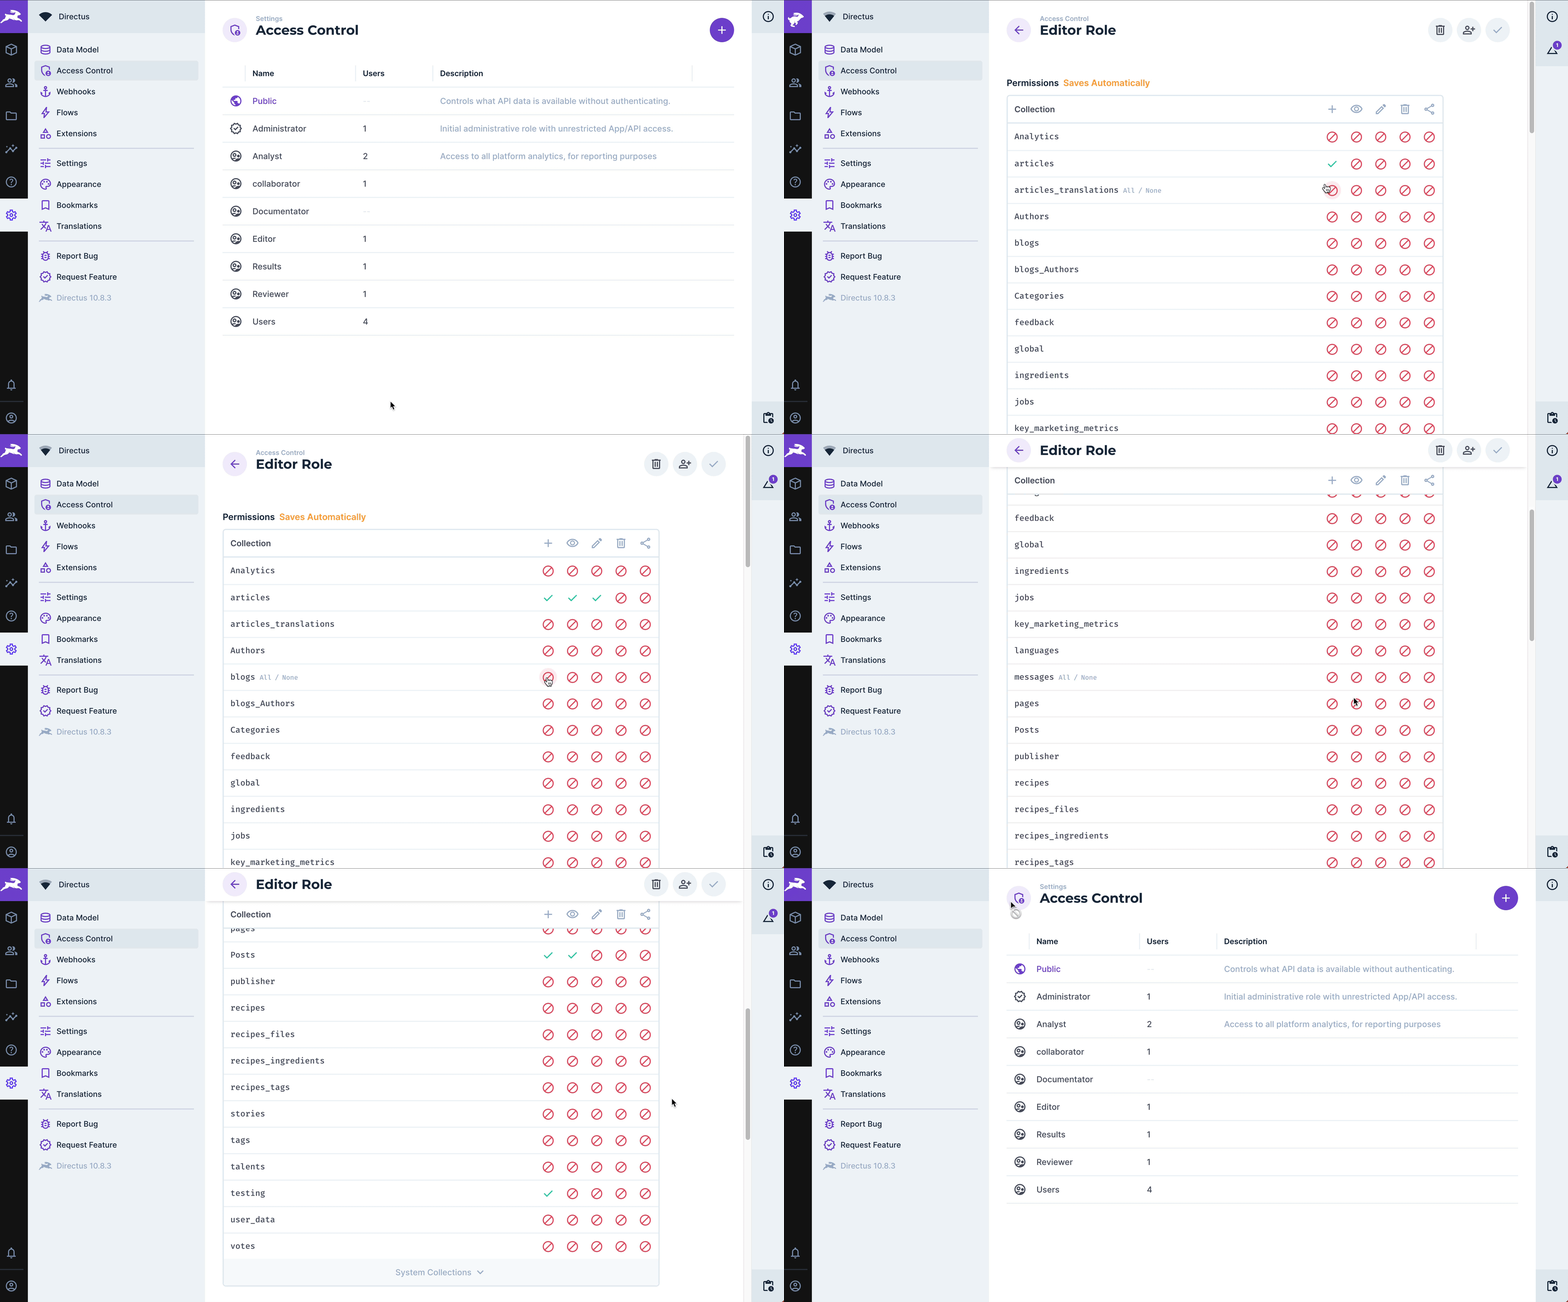
- Navigate to Settings > Access Control > [Role] and scroll to Permissions.
Each collection is a row. Its CRUDS permissions are in columns. - Click the icon of the collection and permission type that you want to set and a tooltip will appear. If you'd like to adjust permissions for Directus system collections, then click System Collections to expand the menu and access these collections.
- Click the icon in the relevant collection row and CRUDS permission column and a popup menu will appear with the following permission levels:
- check All Access — Grants permission to all items in the collection.
- block No Access — Denies permission to all items in the collection.
- rule Use Custom — Opens the custom access permissions drawer.
- From here, there are two possibilities:
- If you selected check All Access or block No Access, setup is complete.
- If you chose rule Use Custom, please see Configure Custom Permissions.
Admin Roles
If you configured the role's details to have Admin Access, permission configuration is disabled.
Configure Custom Permissions

To configure custom access permissions for a role, follow these steps.
Follow the steps to configure permissions and choose rule Use Custom on step four.
Configure custom access permission validations as desired. For each CRUDS permission, you will have one or more of the following sub-menus:
- Item Permissions — Set filters to define items the role is granted permissions.
- Field Permissions — Toggle to limit which fields the role is granted permissions.
- Field Validation — Set filters to define valid field values on create or update.
- Field Presets — Use JSON to set default field values on create or update of an item. The value will then appear on the item page, and can be overwritten if desired.
Click check in the side drawer header to confirm and save custom access permissions.
Toggle All Collection Permissions

To grant or restrict all CRUDS permissions to a collection at once, follow these steps.
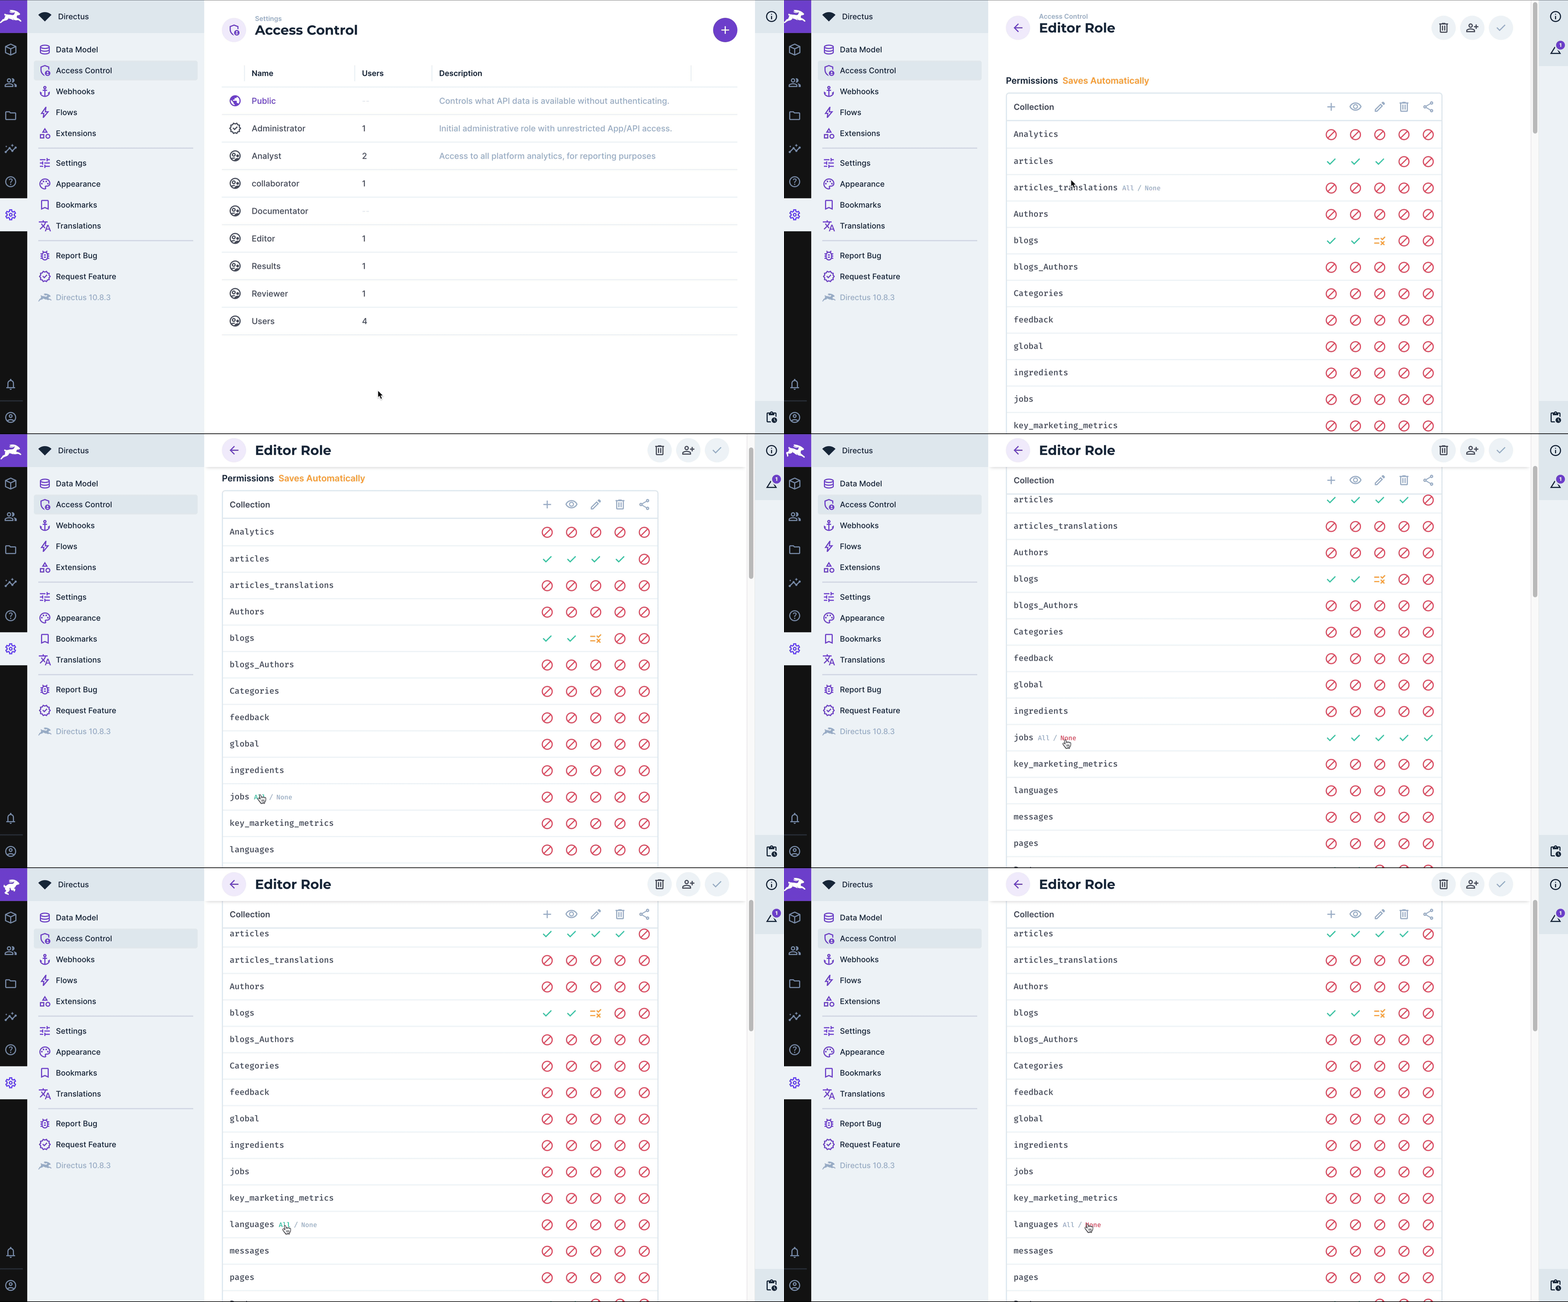
- Navigate to Settings > Access Control > [Role].
- Mouse over the desired collection's name and the following options will appear:
- All — Click to enable all CRUDS permissions for a collection.
- None — Click to restrict all CRUDS permissions for a collection.
Reset System Permissions

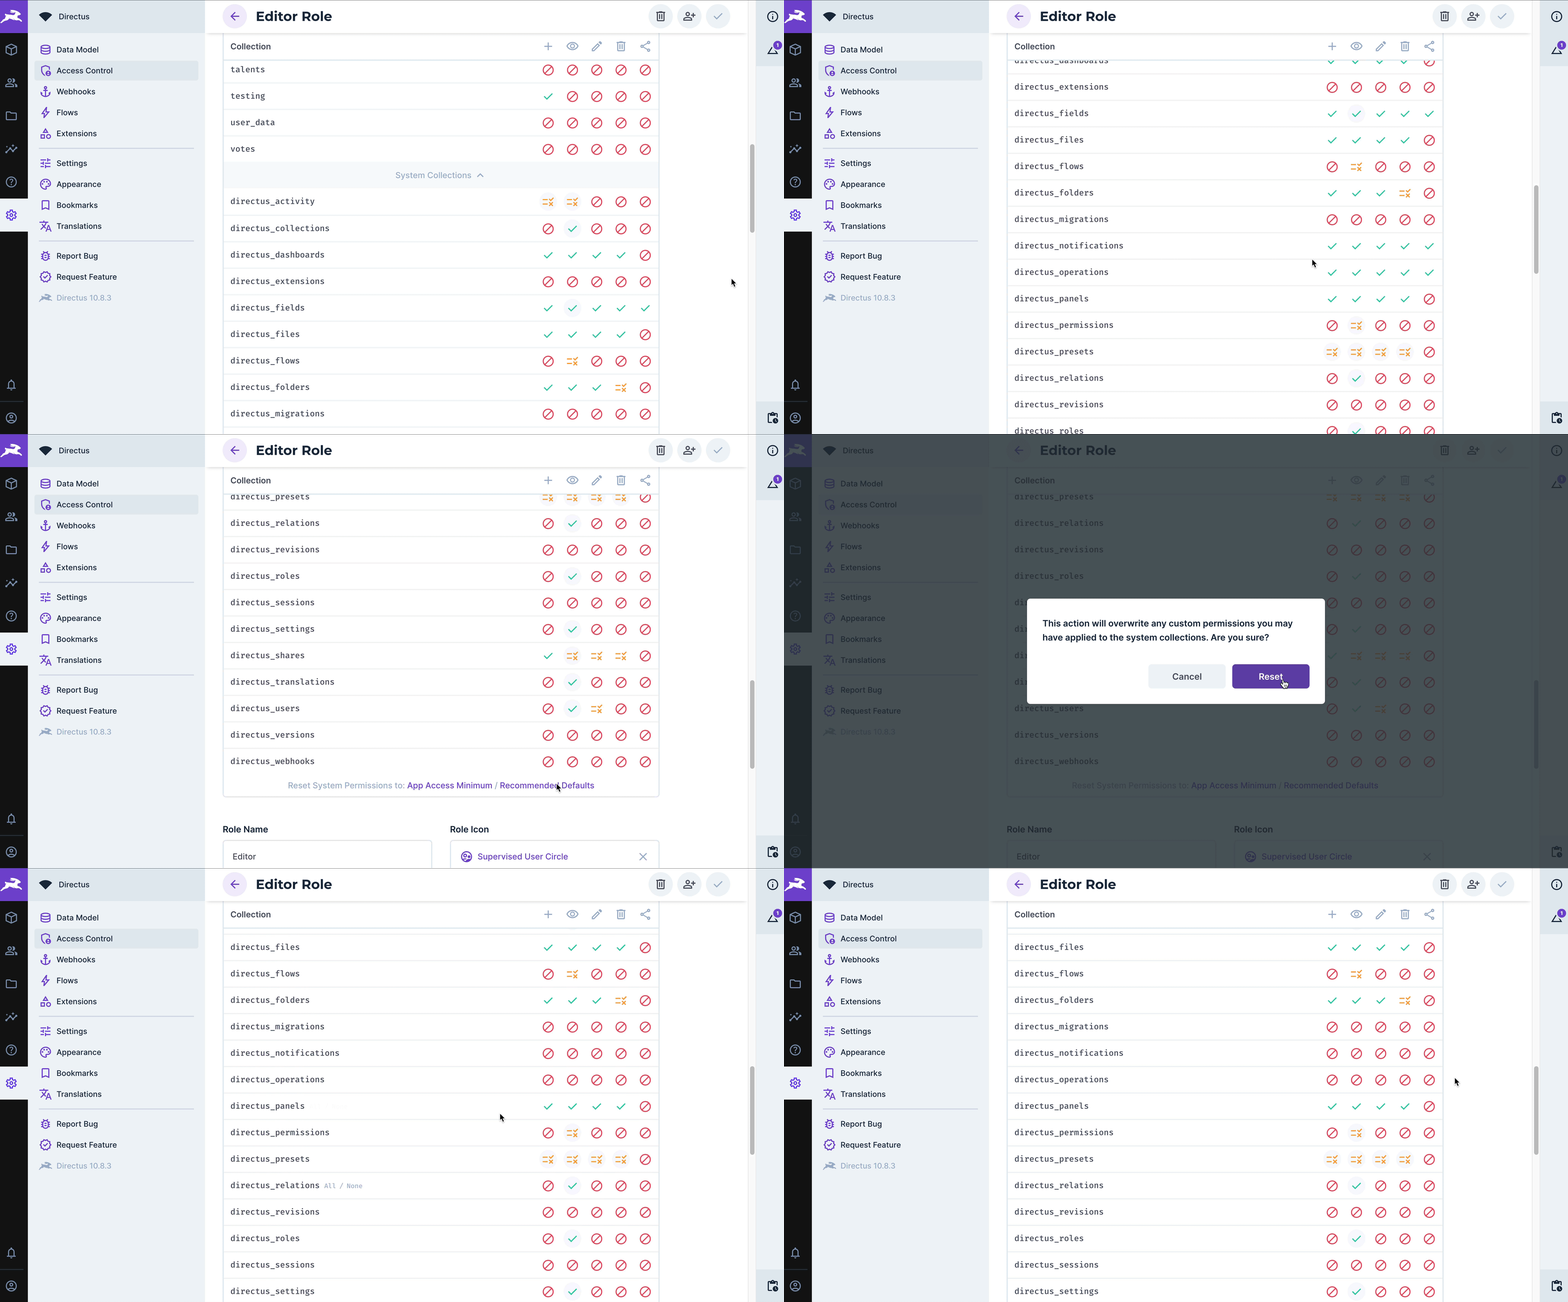
This is only available when App Access is enabled when you configure role details. If you made any custom configurations to system collections, these will be reverted. To reset system permissions, follow these steps.
- Navigate to Settings > Access Control > [Role].
- At the bottom of Permissions, click System Collections to show system collections.
- Scroll to the bottom and choose to Reset System Permissions to:
- App Access Minimum — Reconfigures permissions on system collections to the bare minimum that are required to log in to the app.
- Recommended Defaults — Reconfigures permissions on system collections to the recommended defaults.
- Click Reset to confirm.
TIP
You may notice that when you toggle on App Access Minimum permissions will be hard-coded so they cannot be restricted. However, you are free to reconfigure the Recommended Defaults.