Creating Content Translations
This guide shows how to setup content translations for internationalization (i18n).
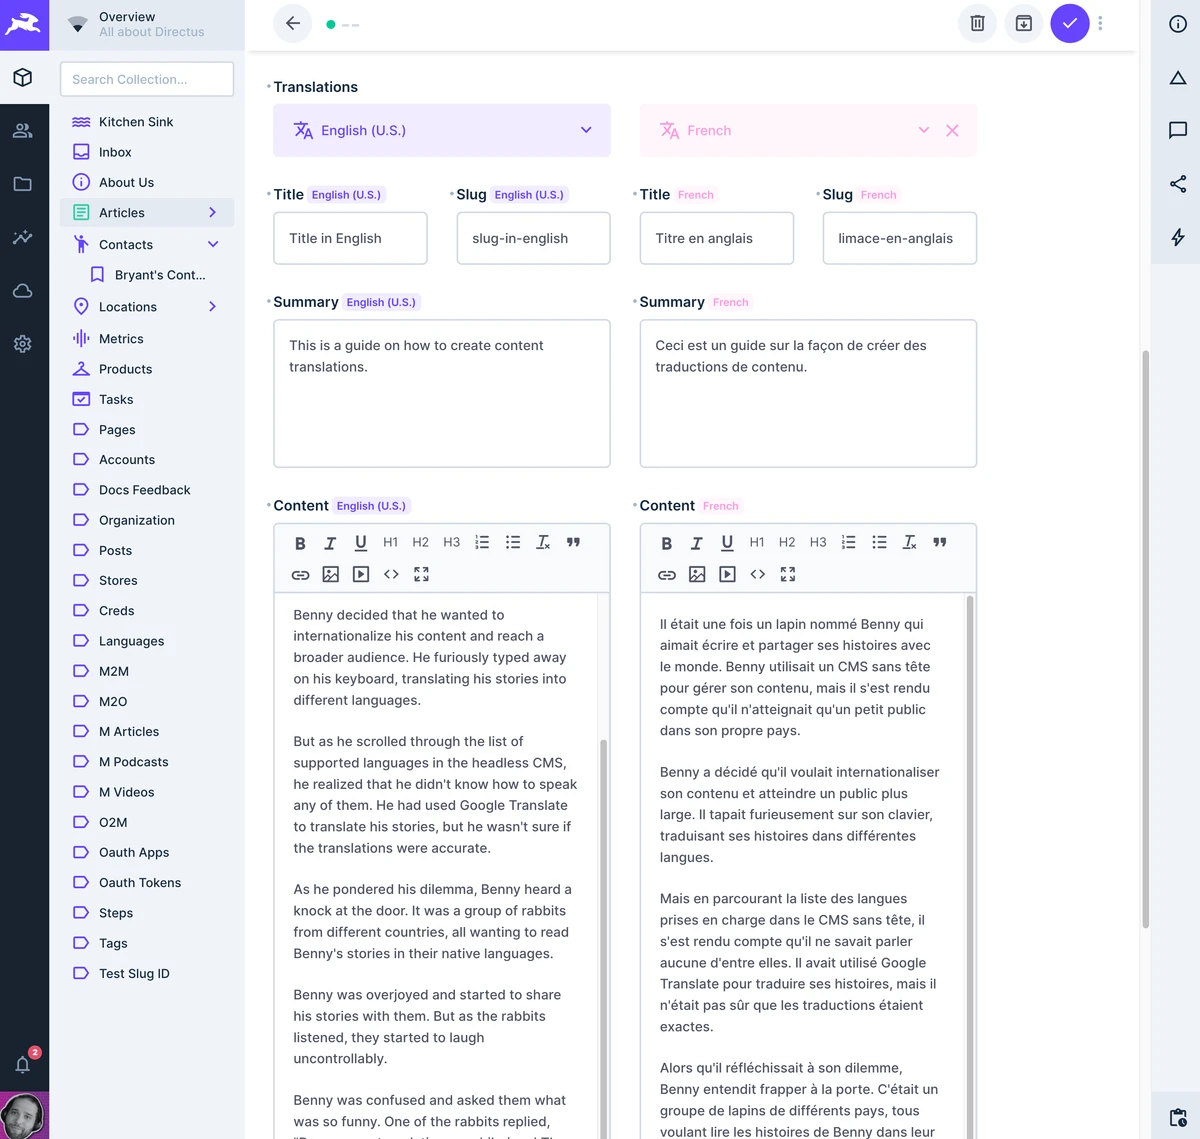
Here's what the end result will look like for users when using the Data Studio to manage content.
Before You Start
You will need:
- A Directus project. The easiest way to get started with Directus is with our managed Directus Cloud service. You can also self-host Directus.
- Familiarity with creating collections and creating fields inside Directus.
You will be creating several collections (one for storing different languages, one for your content, and one junction collection that will store all the different translations of your content). Once you setup the data model, you will test by adding a few languages and some translated content. Lastly, you'll interact with the translations via the API.
Create A Languages Collection
Create a new collection for all the different languages your application will support.
Go to Settings > Data Model and create a new collection for
languages.Here's an overview of the schema for this collection.
mdlanguages - code (Primary Key Field, Type: Manually entered string ) - name (Type: String, Interface: Input) - direction (Type: String, Interface: Dropdown, Default Value: ltr)languages - code (Primary Key Field, Type: Manually entered string ) - name (Type: String, Interface: Input) - direction (Type: String, Interface: Dropdown, Default Value: ltr)a. When creating the collection, set the primary key to
codeand use theManually entered stringtype. There's no need to add Optional Fields.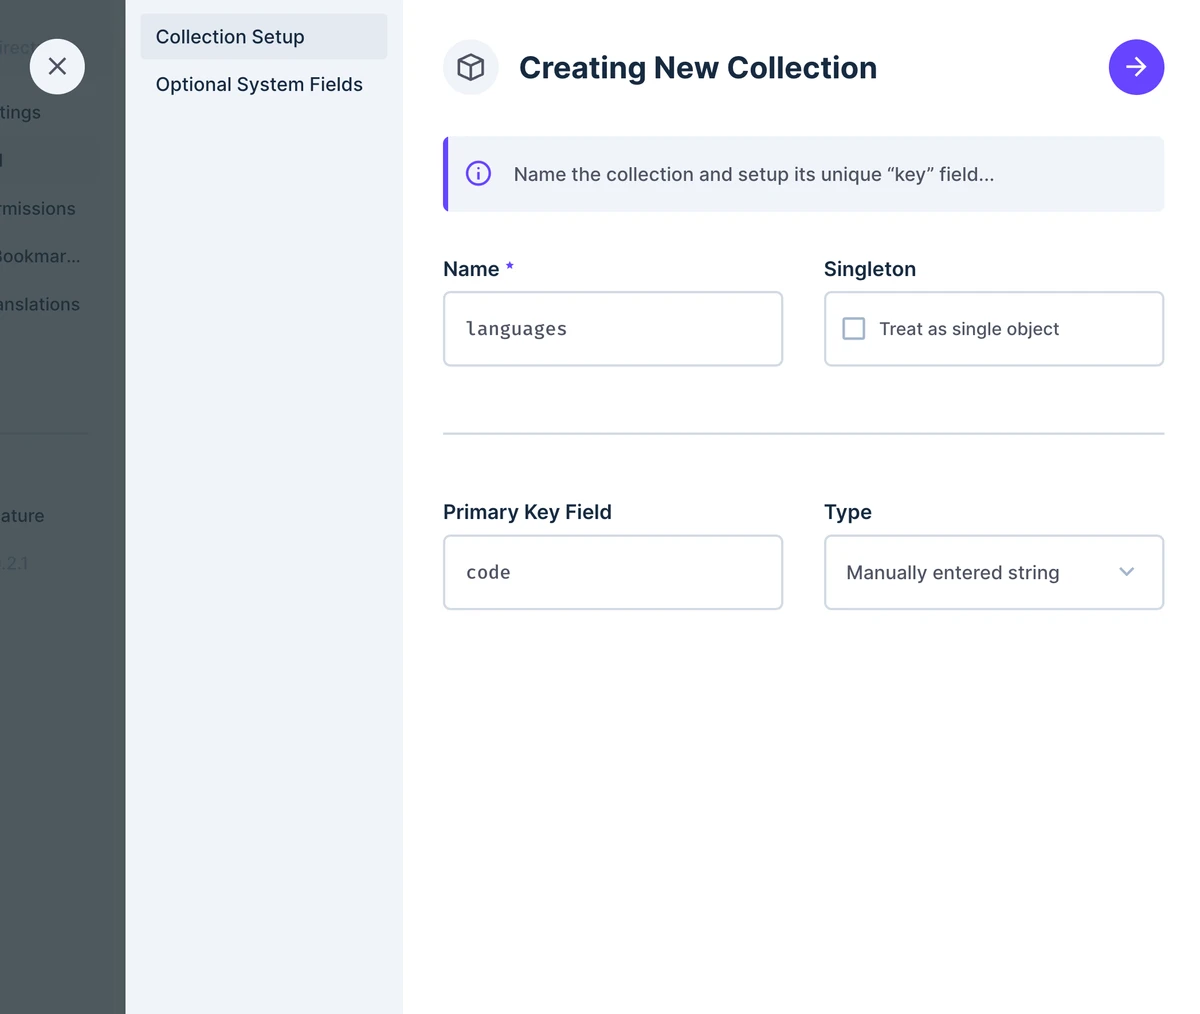
b. Add another field for the
nameof the language.c. Add one last field for the
directionof the text if you're supporting languages that read right to left.
Now you're ready to move on.
Create Content Collection
Before you can create translations, you need a collection of content to translate.
Create a new collection for
articles.Here's an overview of the initial schema for this collection.
mdarticles - id (Primary Key Field, Type: uuid ) - status (Type: String, Interface: Dropdown, Options: ['published','draft','archived']) - image (Type: Image) - author (Type: M2O Relation, Related Collection: directus_users) - date_published (Type: Timestamp, Interface: Datetime)articles - id (Primary Key Field, Type: uuid ) - status (Type: String, Interface: Dropdown, Options: ['published','draft','archived']) - image (Type: Image) - author (Type: M2O Relation, Related Collection: directus_users) - date_published (Type: Timestamp, Interface: Datetime)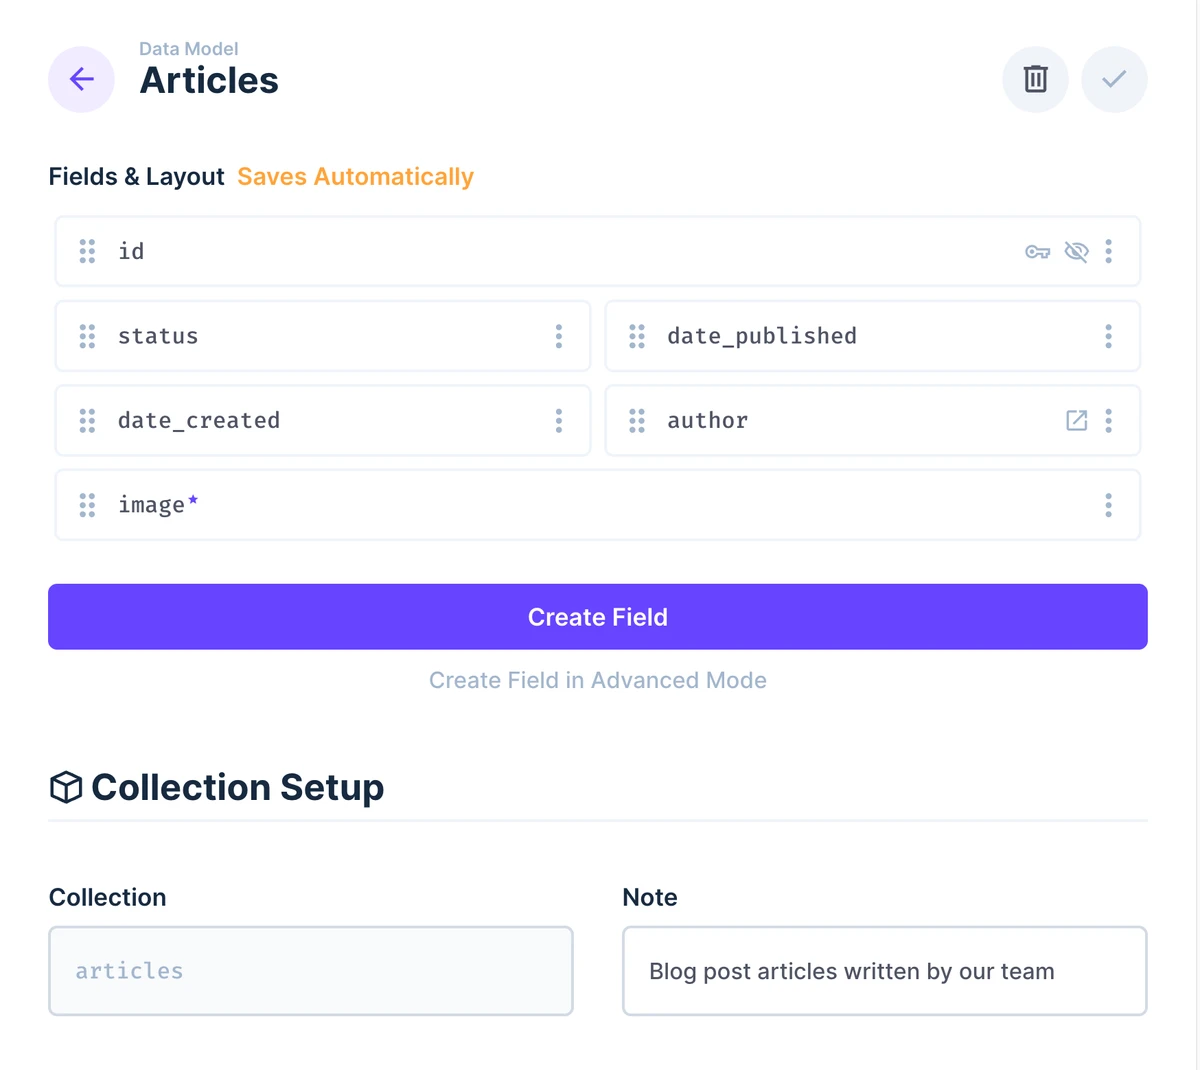
Create these fields inside the collection.
They will be shared across all the different translations of each article.
Do not add the fields to be translated like
titleorcontentorslugyet, because those will be stored in a separate collection shown below.
Create Content Translations Collection
Still within the
articlescollection, create a new field fortranslationsusing the specially designed Translations interface. This will create a new junction collection inside your project.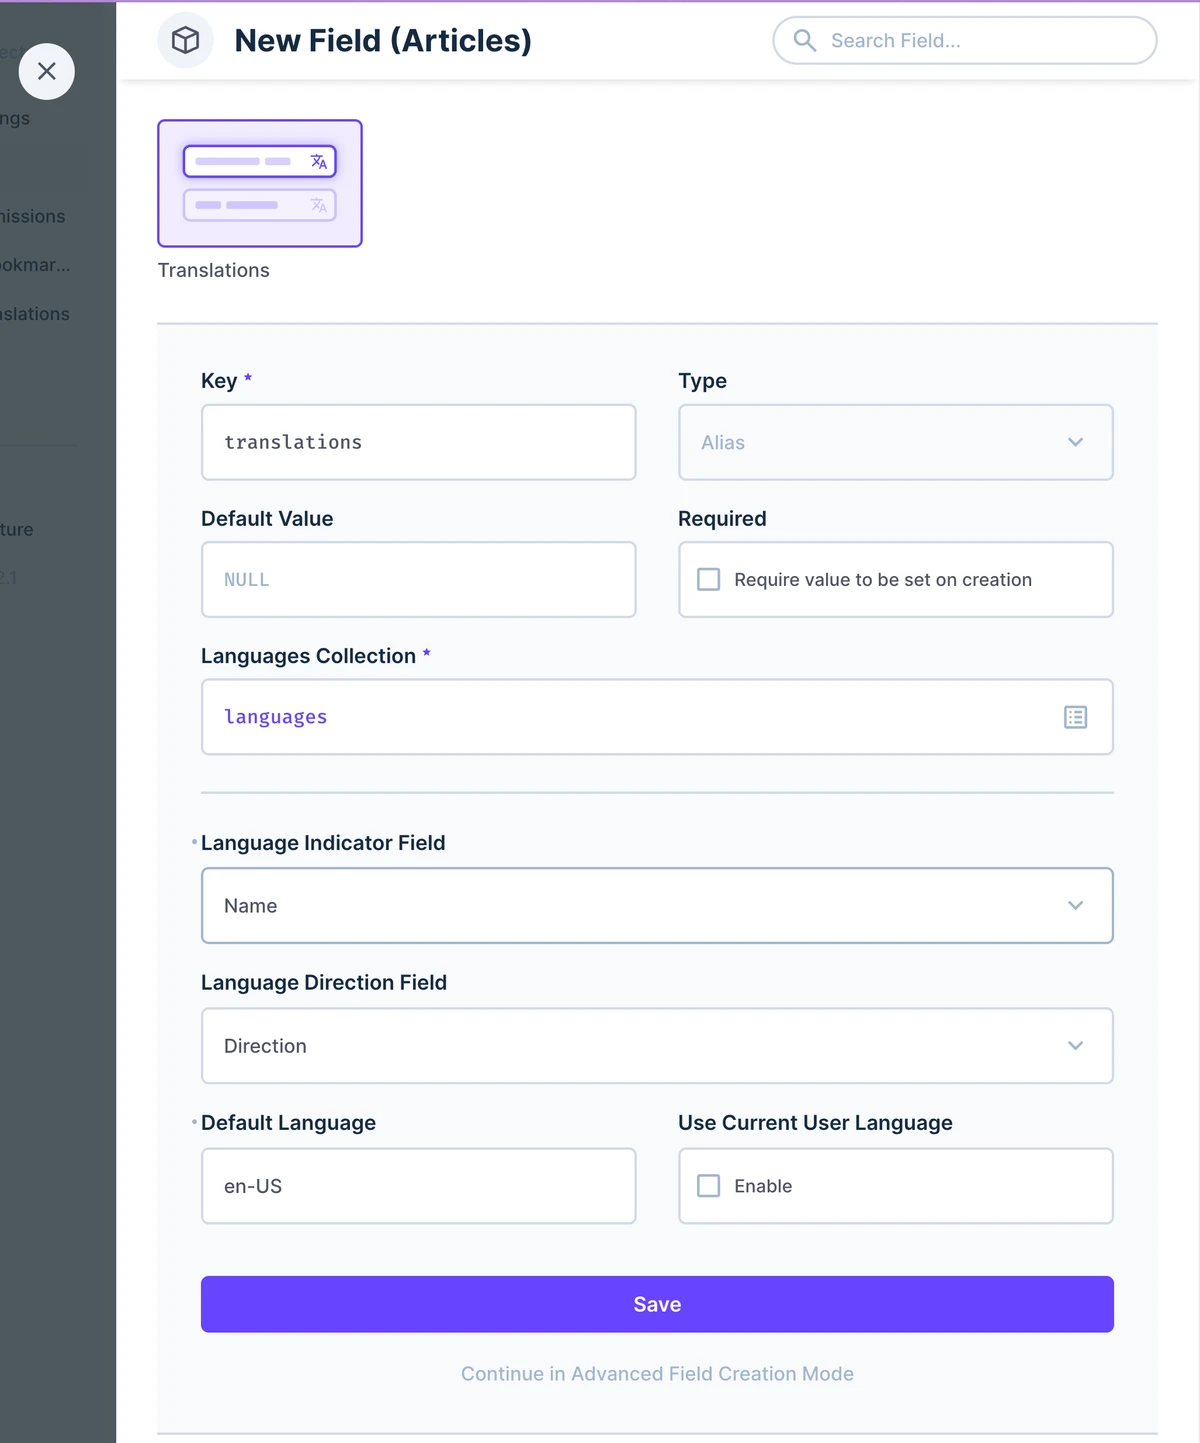
- Use
translationsfor the key. - For the Languages Collection field, select the
languagescollection you created in Step 1. - For Language Indicator Field, you could use the
codeornamefields depending on personal preference. - For Language Direction Field, choose the
directionfield. - You can also select a Default Language by entering the primary key or
codefor that language.
- Use
TIP
By default Directus will name this junction collection articles_translations following the convention {collection_name}_translations. If you want more control over the naming of your translation collection and the fields within, you can choose to Continue in Advanced Field Creation Mode.
Add The Fields To Be Translated
Navigate to the newly created
articles_translationscollection and create the fields for the content you'll translate into different languages.Here's a sample schema for the collection.
mdarticles_translations - title (Type: String, Interface: Input ) - slug (Type: String, Interface: Input) - summary (Type: Text, Inteface: Textarea) - content (Type: Text, Interface: WYSIWYG)articles_translations - title (Type: String, Interface: Input ) - slug (Type: String, Interface: Input) - summary (Type: Text, Inteface: Textarea) - content (Type: Text, Interface: WYSIWYG)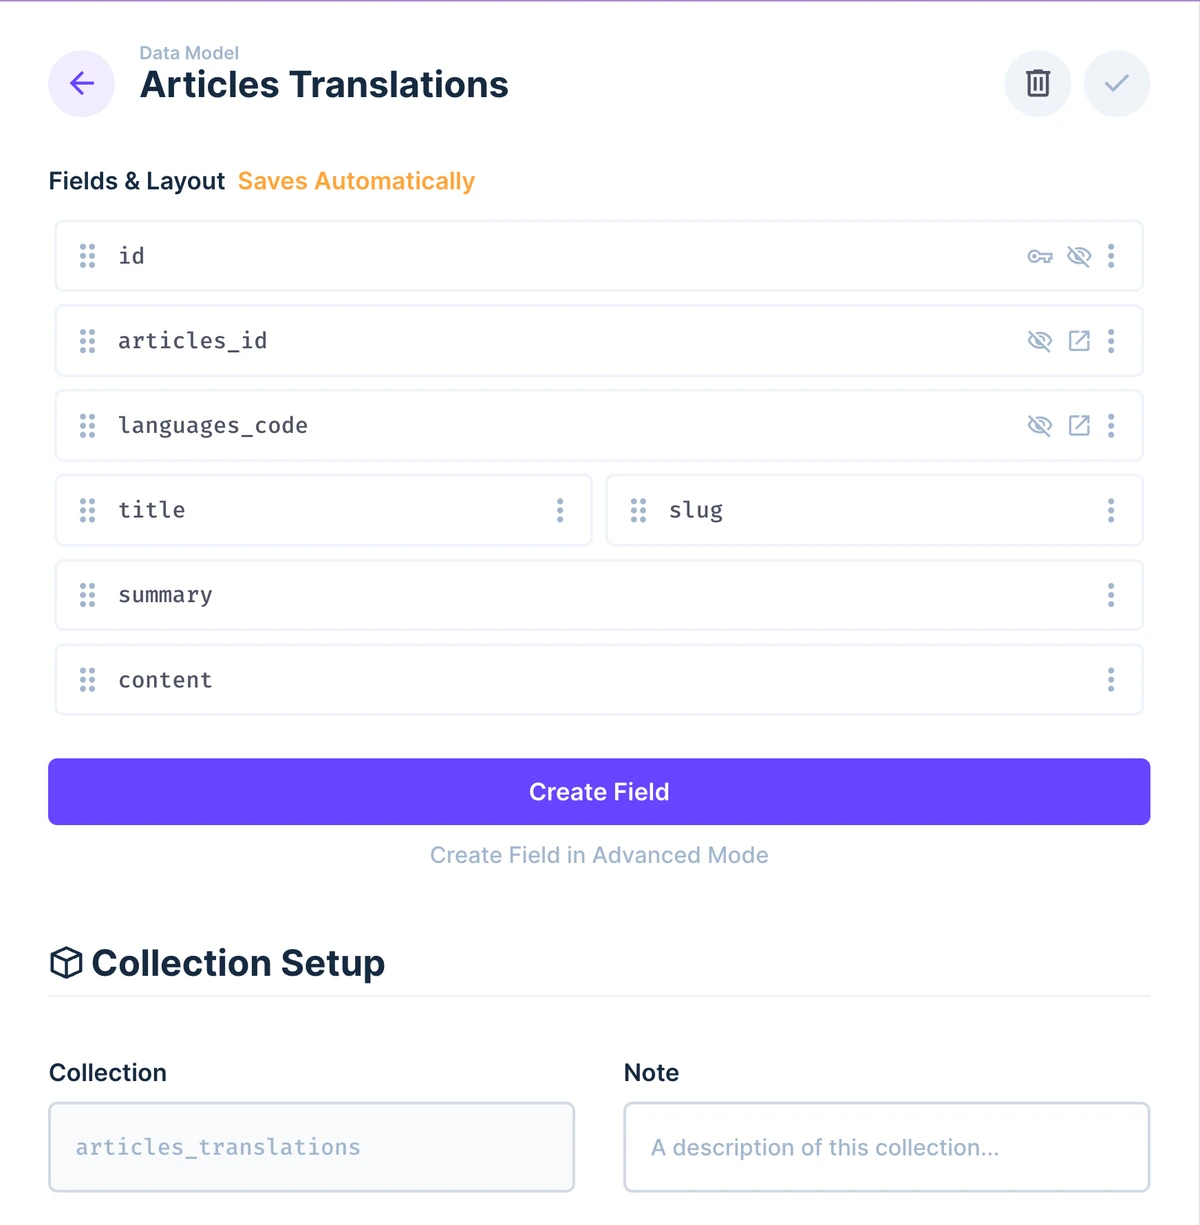
Test By Creating Content
Everything is now setup to allow you to translate Articles into multiple languages so it's time to test what you've built.
Before you create your first article, you'll need to add a few items to the
languagescollection. Navigate to the Content module > Languages collection and add two languages.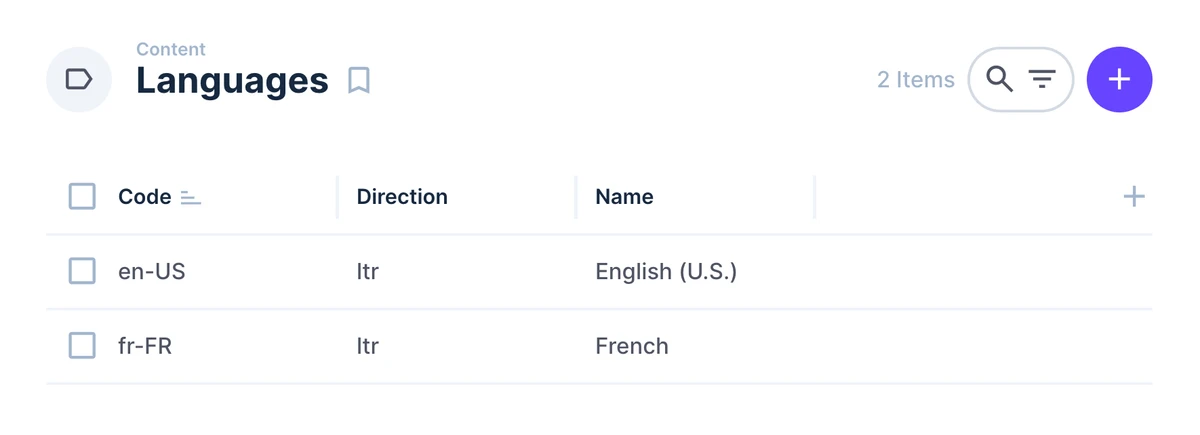
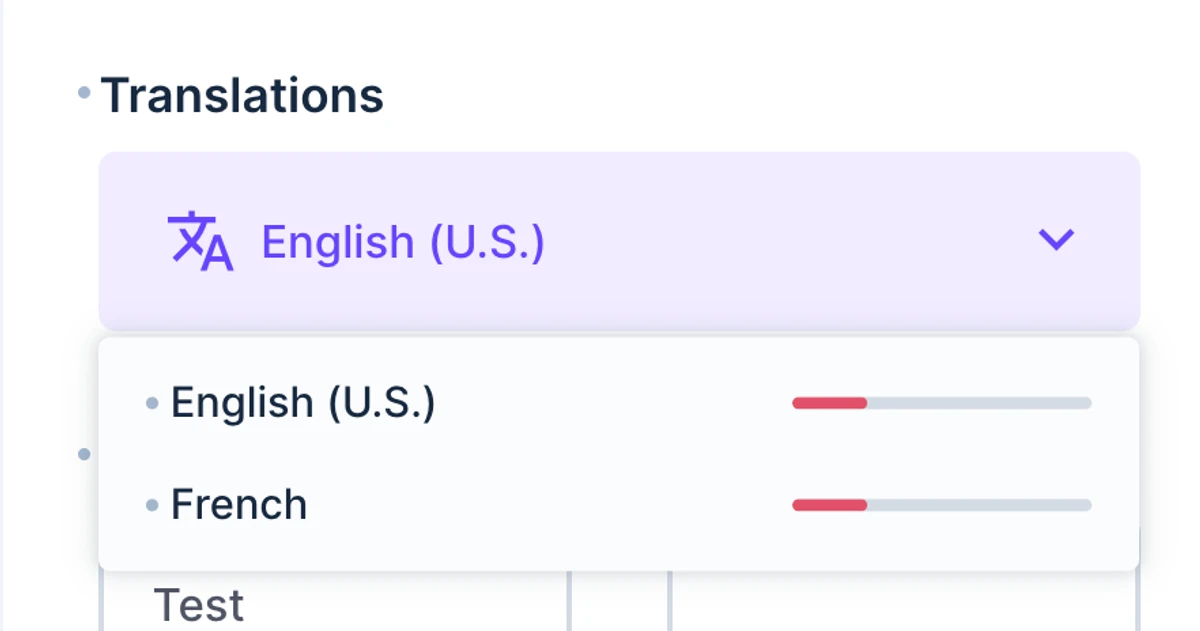
In the Articles collection, create a new article and scroll down to the Translations field and start translating your content.
You can show one language at a time or show two languages side by side.

There is also a progress indicator for the status of each language.
Fetching Translated Content With The API
Next, you'll want to access your content via the API. If you try to use /items/articles then translations returns an array of IDs.
Instead, you'll want to add a few parameters to your API call.
- Fields parameter to select the relational field data.
- Limit parameter to only return the a single result.
- Deep parameter to filter the related collection to only show the translations in the current language.
TIP
Study the Global Query Parameters > Fields > Deep parameter to learn how to filter nested relational data . It's incredible powerful.
Sample Request
import { createDirectus, rest, readItems } from '@directus/sdk';

// Initialize the SDK.
const directus = createDirectus('https://directus.example.com').with(rest());

// Write some code here in your front-end framework that gets the slug from the current URL.
const slug = 'slug-in-english';
const languageCode = 'en-US';

// Call the Directus API using the SDK using the locale of the frontend and the slug.
const pages = await directus.request(
	readItems('articles', {
		deep: {
			translations: {
				_filter: {
					_and: [
						{
							languages_code: { _eq: languageCode },
						},
						{
							slug: { _eq: slug },
						},
					],
				},
			},
		},
		fields: ['*', { translations: ['*'] }],
		limit: 1,
	})
);

const page = pages[0];
import { createDirectus, rest, readItems } from '@directus/sdk';
// Initialize the SDK.
const directus = createDirectus('https://directus.example.com').with(rest());
// Write some code here in your front-end framework that gets the slug from the current URL.
const slug = 'slug-in-english';
const languageCode = 'en-US';
// Call the Directus API using the SDK using the locale of the frontend and the slug.
const pages = await directus.request(
readItems('articles', {
deep: {
translations: {
_filter: {
_and: [
{
languages_code: { _eq: languageCode },
},
{
slug: { _eq: slug },
},
],
},
},
},
fields: ['*', { translations: ['*'] }],
limit: 1,
})
);
const page = pages[0];Toggle Open to See Sample Response
{
	"data": [
		{
			"image": "1ee63d48-d4c6-4d01-aef5-f8b441ac792e",
			"date_created": "2021-11-11T22:20:33.433Z",
			"author": "bbcf79f6-9d19-42e7-8ef6-0151780799f4",
			"id": 14,
			"status": "published",
			"date_published": null,
			"translations": [
				{
					"id": 1,
					"articles_id": 14,
					"languages_code": "en-US",
					"title": "Title in English",
					"slug": "slug-in-english",
					"summary": "This is a guide on how to create content translations.",
					"content": "<p>Once upon a time, there was a bunny named Benny who loved to write and share his stories with the world. Benny had been using a headless CMS to manage his content, but he realized that he was only reaching a small audience in his own country.</p>\n<p>Benny decided that he wanted to internationalize his content and reach a broader audience. He furiously typed away on his keyboard, translating his stories into different languages.</p>\n<p>But as he scrolled through the list of supported languages in the headless CMS, he realized that he didn't know how to speak any of them. He had used Google Translate to translate his stories, but he wasn't sure if the translations were accurate.</p>\n<p>As he pondered his dilemma, Benny heard a knock at the door. It was a group of rabbits from different countries, all wanting to read Benny's stories in their native languages.</p>\n<p>Benny was overjoyed and started to share his stories with them. But as the rabbits listened, they started to laugh uncontrollably.</p>\n<p>Benny was confused and asked them what was so funny. One of the rabbits replied, \"Benny, your translations are hilarious! They don't make any sense!\"</p>\n<p>Benny was embarrassed but couldn't help but laugh along with the other rabbits. He realized that he needed to find a better way to internationalize his content.</p>\n<p>From that day on, Benny made sure to hire professional translators to translate his stories into different languages. And he lived happily ever after, sharing his stories with rabbits from all over the world.</p>"
				}
			]
		}
	]
}
{
"data": [
{
"image": "1ee63d48-d4c6-4d01-aef5-f8b441ac792e",
"date_created": "2021-11-11T22:20:33.433Z",
"author": "bbcf79f6-9d19-42e7-8ef6-0151780799f4",
"id": 14,
"status": "published",
"date_published": null,
"translations": [
{
"id": 1,
"articles_id": 14,
"languages_code": "en-US",
"title": "Title in English",
"slug": "slug-in-english",
"summary": "This is a guide on how to create content translations.",
"content": "<p>Once upon a time, there was a bunny named Benny who loved to write and share his stories with the world. Benny had been using a headless CMS to manage his content, but he realized that he was only reaching a small audience in his own country.</p>\n<p>Benny decided that he wanted to internationalize his content and reach a broader audience. He furiously typed away on his keyboard, translating his stories into different languages.</p>\n<p>But as he scrolled through the list of supported languages in the headless CMS, he realized that he didn't know how to speak any of them. He had used Google Translate to translate his stories, but he wasn't sure if the translations were accurate.</p>\n<p>As he pondered his dilemma, Benny heard a knock at the door. It was a group of rabbits from different countries, all wanting to read Benny's stories in their native languages.</p>\n<p>Benny was overjoyed and started to share his stories with them. But as the rabbits listened, they started to laugh uncontrollably.</p>\n<p>Benny was confused and asked them what was so funny. One of the rabbits replied, \"Benny, your translations are hilarious! They don't make any sense!\"</p>\n<p>Benny was embarrassed but couldn't help but laugh along with the other rabbits. He realized that he needed to find a better way to internationalize his content.</p>\n<p>From that day on, Benny made sure to hire professional translators to translate his stories into different languages. And he lived happily ever after, sharing his stories with rabbits from all over the world.</p>"
}
]
}
]
}Next Steps
Over the course of this guide, you've setup the basics for translating your content within Directus. Nice work!
Next, you would setup translations collections for all the different content collections you'll be translating.
Test Your API Calls
Your Headless CMS is just one side of the equation so don't forget to test the API responses and handle them appropriately within your frontend.
Check Your Permissions
If you notice you aren't receiving the data that you expect, check the Permissions settings for your Public or chosen role. You'll have to enable Read access for the languages, articles, and articles_translations collections.